
How to Add a New Employee in Lizzy
Adding a New Employee and Setting up their Profile
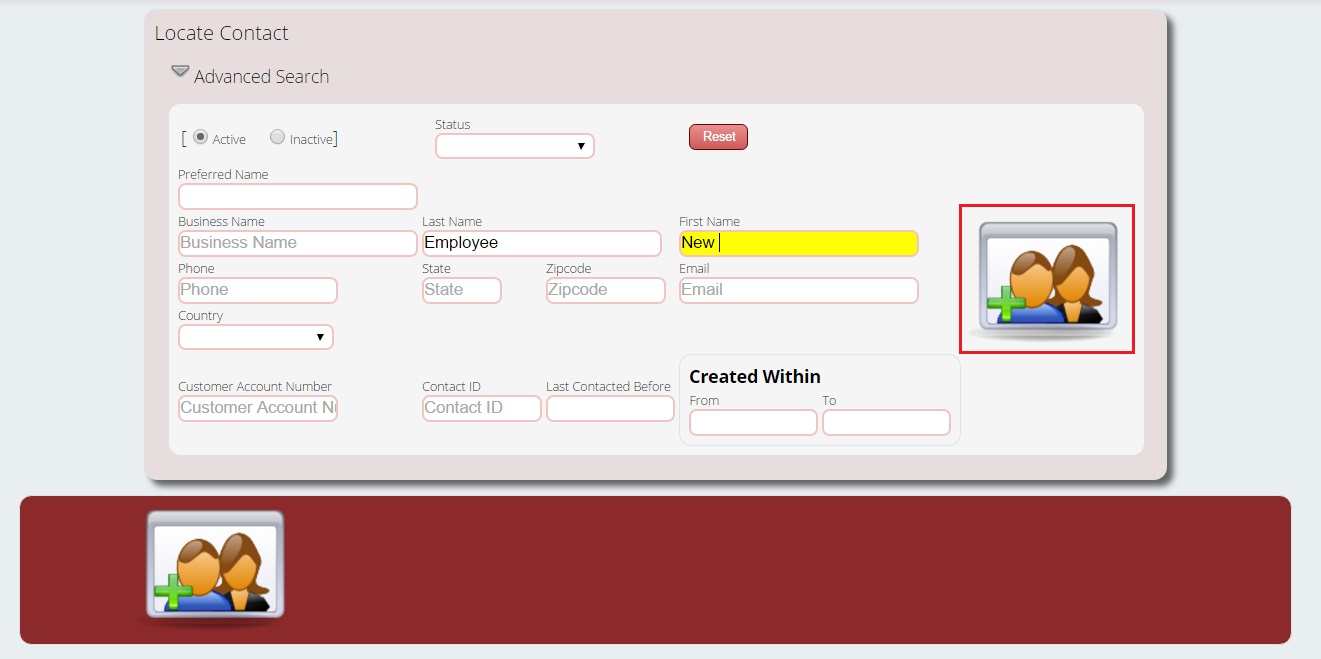
Step #1: Locate the employee by going to Contacts > Locate Contact. We first want to enter their information in the locate screen, to ensure that they aren’t already in the database. Enter in their first & last names. (Note: Lizzy has a real-time search, so as you type, Lizzy will be narrowing down the search results based on what you enter. You can skip entering the entire name if you see the correct contact record appear.) If the employee already has a contact record, please proceed to Step #2. If not, click the add contact button.
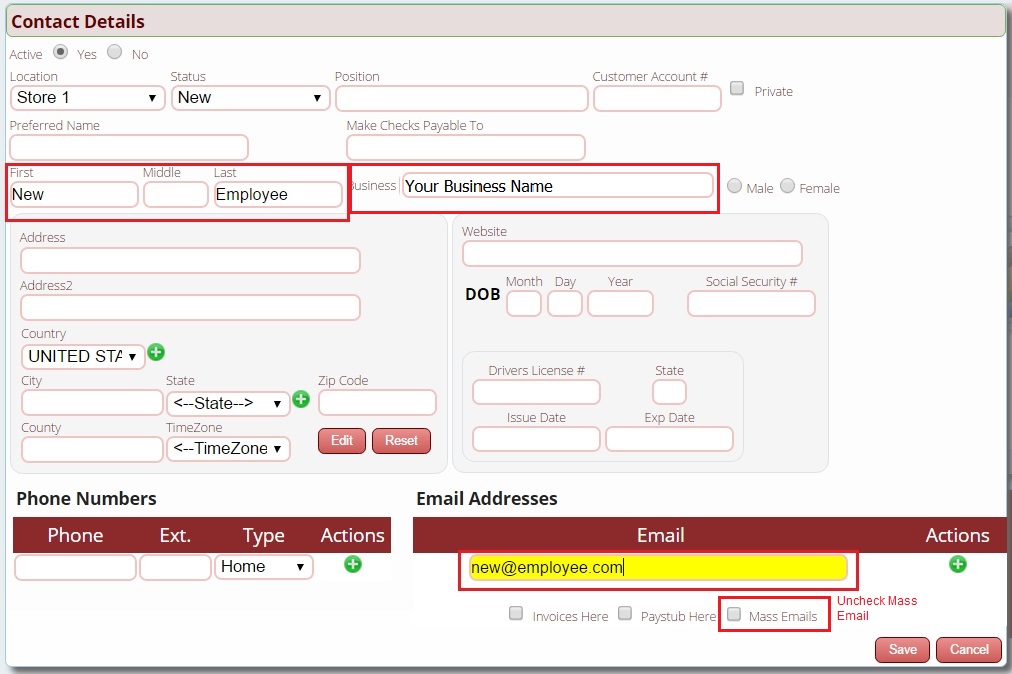
Step # 2: Enter any information not already filled in, such as your business name (entering the business name helps later when searching for employees) and the employee’s email address. When entering the email address, you may wish to uncheck Mass Email to avoid sending marketing/sales emails to your employee when you send them to customers. You can enter any other information that you have for them now (phone number, address, etc) or you may go back and enter it later once you have it. Click save once done.
Step # 3: Click on the pencil next to Contact Type.

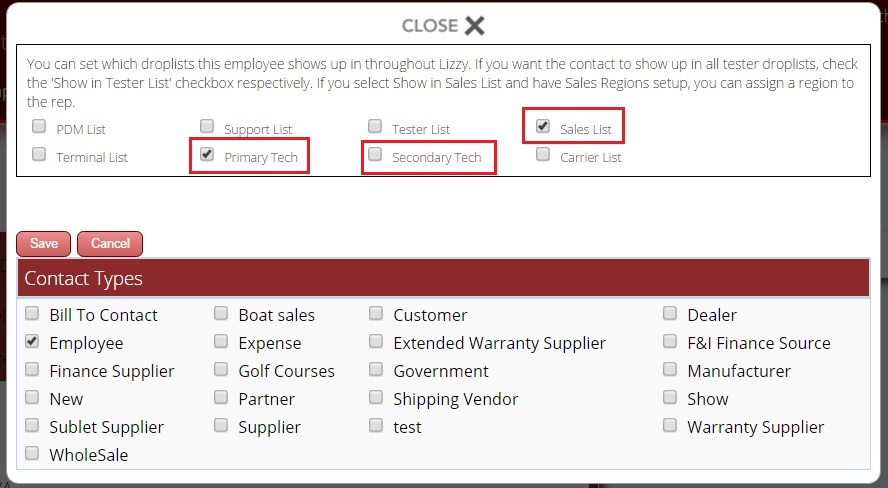
Check that they are an Employee. (If they are not also a customer, you can uncheck that option.) Once you select that they are an Employee, a box will open with some other options. Here you can set them as a Primary Tech or a Secondary Tech if they are a mechanic. If they are a salesperson, check the Sales List option instead. Click save when done.
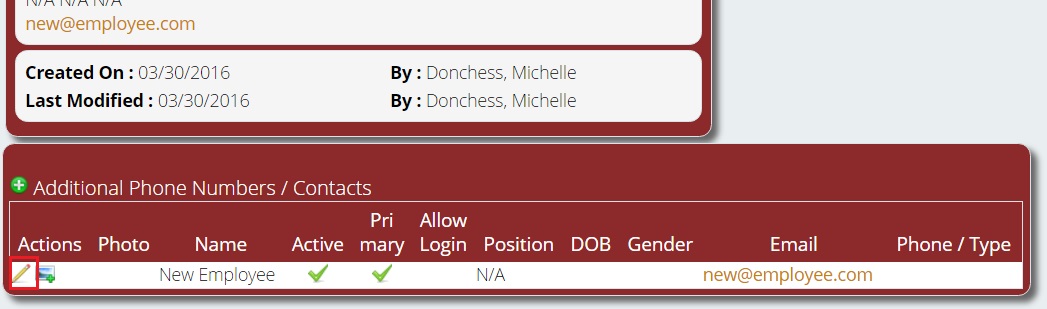
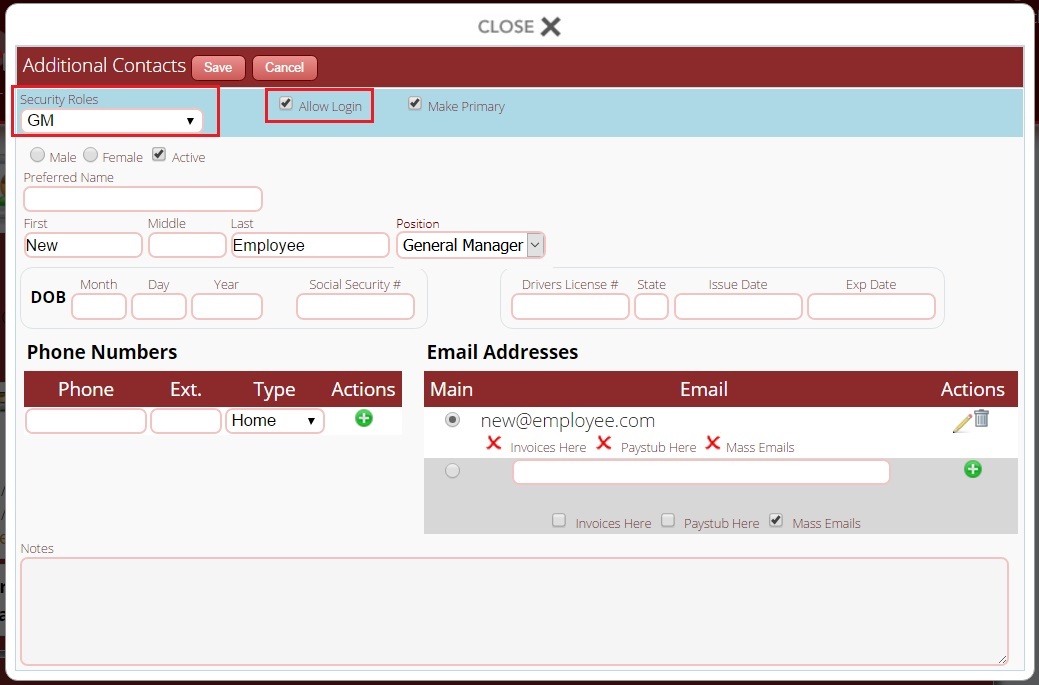
Step # 4: You will also need to assign the employee a security role and set them to login. To do this, go to Additional Phone Numbers / Contacts and click on the pencil next to the employee’s name.
Select the security role from the drop down list that you are assigning to the employee and then check Allow Login and Save. Lizzy will then email a password to the employee (at the email address you entered for them). The password is case sensitive (it will be in all caps).
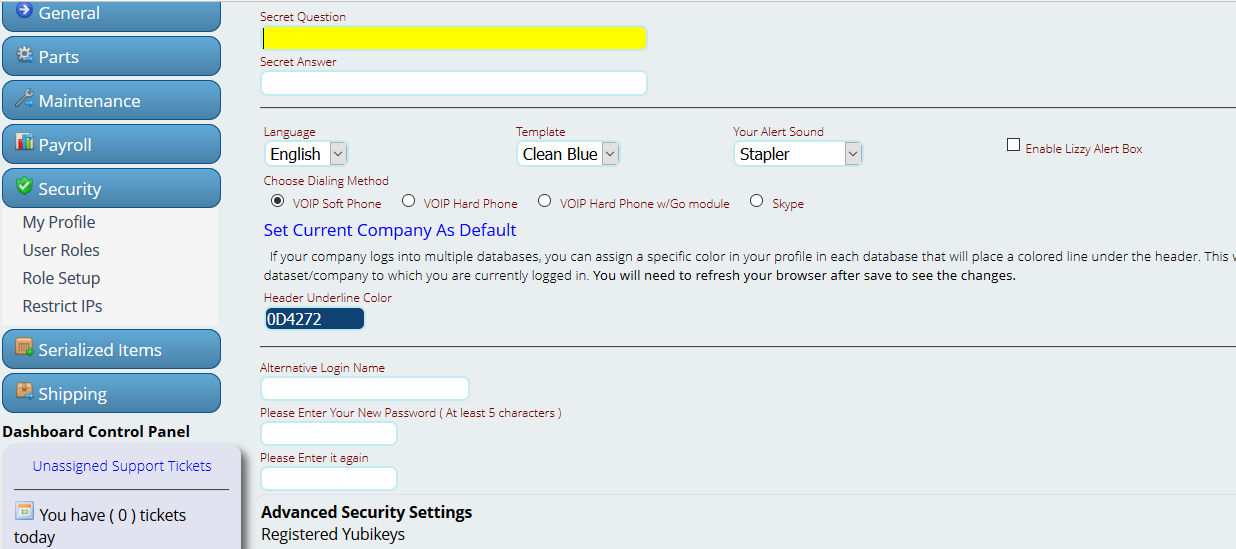
Step #5: Once the new employee gets their password via email, they can login. Their login is automatically set to be the email address you entered for them in Step #2. They can change their password and login info under Settings > Security > My Profile. They can also put in a secret question and answer in case they forget their new password. The Alternate Login name must be at least 3 characters and unique. The password must be at least 5 characters (it can be all letters, numbers, symbols or a combination of all of them). Save when done.
Please note: you will still need to add the employee’s details in Payroll, which requires a few additional steps. These are detailed in the Payroll training video 1.2 “Employee Setup.” (You can find the training videos under the Train Me link when you are logged into Lizzy.) You will also need to add the employee to the appropriate department for printing time sheets. When ready to do so, please proceed to this blog: Printing Employee Time Sheets.